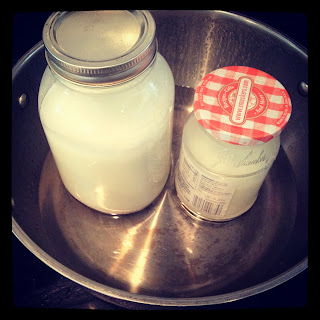
Disclaimer: This was my first time making yogurt at home and though successful, there are a few things that I would adjust next time I make it. Check out the end of this post for more resources!
What you'll need:
- a large pot that fits multiple jars
- smaller saucepan that can hold at least 1 quart of milk
- milk (I used 1 quart of whole milk from Whole Foods ($1.19). If this is your first time making yogurt, I'd suggest starting with this amount.)
- glass jars with lids (clean jam jars would work fine)
- thermometer
- yogurt starter (I used store-bought Stonyfield's organic 0% plain yogurt at 5/$3)
Note the six live active yogurt and probiotic cultures listed on the back of the Stonyfield cup - S. thermophilus, L. bulgaricus, L. acidophilus, bifidus, L. casei, and L. rhamnosus. These guys are the key players that we're trying to make happy in this recipe.
1. To start, place your glass jars and unscrewed lids at the bottom of a larger steamer pot and fill pot 2 inches deep with water. Bring to a boil for 5 minutes to sterilize your jars and lids. Set your clean jars and lids aside to cool and dry. Also, keep this pot of hot water - *this will come in handy later.
2. Pour 1 quart of milk into a sauce pan and turn heat to high. Stir occasionally. When the milk starts to look frothy but not yet boiling, check the temperature with your thermometer to make sure that it has reached about 195 degrees Fahrenheit. (Since this isn't an exact science, difference sources note different temperatures, but the general consensus seems to be between 180-195 degrees. Also, one source says to leave the milk at this temperature for 15 minutes to boil off the water for a thicker yogurt. I took my sauce pan off the heat once the milk hit this temperature but perhaps I will try the prolonged heat next time.)
 |
| Heating milk kills any bacteria in the milk and creates the yogurt's texture |
3. Allow milk to cool to 110-115 degrees Fahrenheit. (If you proceed before this crucial cooling step, you'll likely kill the bacteria in the yogurt starter and end up with very runny yogurt.) In a time crunch, you may speed up this process by putting the saucepan into the fridge. For me, it took ~45 minutes at room temperature on a 90 degree day.
4. Add one tablespoon (per quart) of the store-bought yogurt into the cooled milk and whisk to blend.
5. Pour the mixture into your clean glass jars and screw on the lids. Set the jars into the water bath that you had used earlier to sterilize the jars.* The water should still be at least lukewarm if not hot.
6. Leave the jars undisturbed in a warm place for a few hours until the yogurt appears solidified - a little runny is okay. (I left mine out for 8 hours.) Then move to the refrigerator.
I left my yogurt in the fridge overnight and had some for breakfast with honey and fresh fruit. Delicious! The texture is smooth and creamy though not as thick as store-bought yogurt, which contains pectin. Making homemade yogurt thicker is possible by maintaining the 190 degree temperature for 15+minutes (mentioned earlier), adding powdered milk, and straining the yogurt at the end with either cheesecloth or a fine mesh strainer. There are many other variations to experiment with for future yogurt batches. Changing the length of incubation will change the taste - I've heard that the longer the time, the more tart the yogurt becomes. Also, since this is plain yogurt, there is room for adding sweeteners and flavoring such as vanilla extract to the milk before adding the starter. I sense many homemade yogurt projects in the near future!
After this first yogurt-making experience, I can't imagine buying yogurt cups from the store based on these reasons:
- Cost - It still amazes me that just one tablespoon of store-bought yogurt + a quart of milk yields nearly two jars of yogurt that will last me for over a week. One cup of store-bought Stonyfield yogurt is $0.60, on sale at 5/$3. One quart of homemade yogurt required a quart of whole milk at $1.19 and a tablespoon of yogurt (if rounding up to $0.60 for the entire cup; otherwise it would be free if you use yogurt from a previous homemade batch), coming to a total of $1.79/quart of yogurt or about $0.45 per cup! (The saving is even greater when you buy your milk in larger quantity.) That's roughly a saving of 25% (underestimate) which can equate to a lot of money for someone who eats yogurt regularly.
- Health - Many preservatives and sugars go into store-bought yogurt, especially fruit-on-the-bottom varieties. Blegh. By making your own, you not only know exactly what is in your yogurt and also have liberty of adding whatever you'd like.
- Environmentally friendly - Buying yogurt in small cups generates so much plastic waste. Homemade yogurt produces zero waste and the yogurt itself can be used as starter for future batches. And of course, glassware can be reused.
- Taste - Okay, maybe this category is subjective and perhaps I'm biased toward something I made with sweat and love. When I tasted my homemade yogurt, I did a side-by-side comparison with the store-bought Stonyfield. My homemade yogurt has a lighter, creamier taste and is certainly less tart.
 |
| Homemade vs. Stonyfield's |
Resources:
- Frugal Girl's recipe is the one that I roughly followed (she also has a great cost saving analysis post)
- 101cookbooks details a slightly different recipe


No comments:
Post a Comment